Edit timesheets
Sometimes mistakes happen when logging timesheets. Thankfully, Hectre offers the means to edit both single timesheets and multiple timesheets.
Important Note!
If you are editing a picking job that has bins assigned to it, you will only be able to edit the time and rate. Location and job type can not be edited while bins are assigned.
In this article we'll cover:
- Editing Single Timesheets
- Editing Multiple Timesheets
Editing Single Timesheets
If you notice some incorrect details on your own timesheet or one of your team's timesheets , you can edit those details on the timesheet summary page.

Step 1
To view a summary for an individual timesheet,
- Click the i icon next to the name of the staff member you want to view
Note
If you're editing a timesheet that's still in progress, you'll find that person on the Clocked In tab.

Step 2
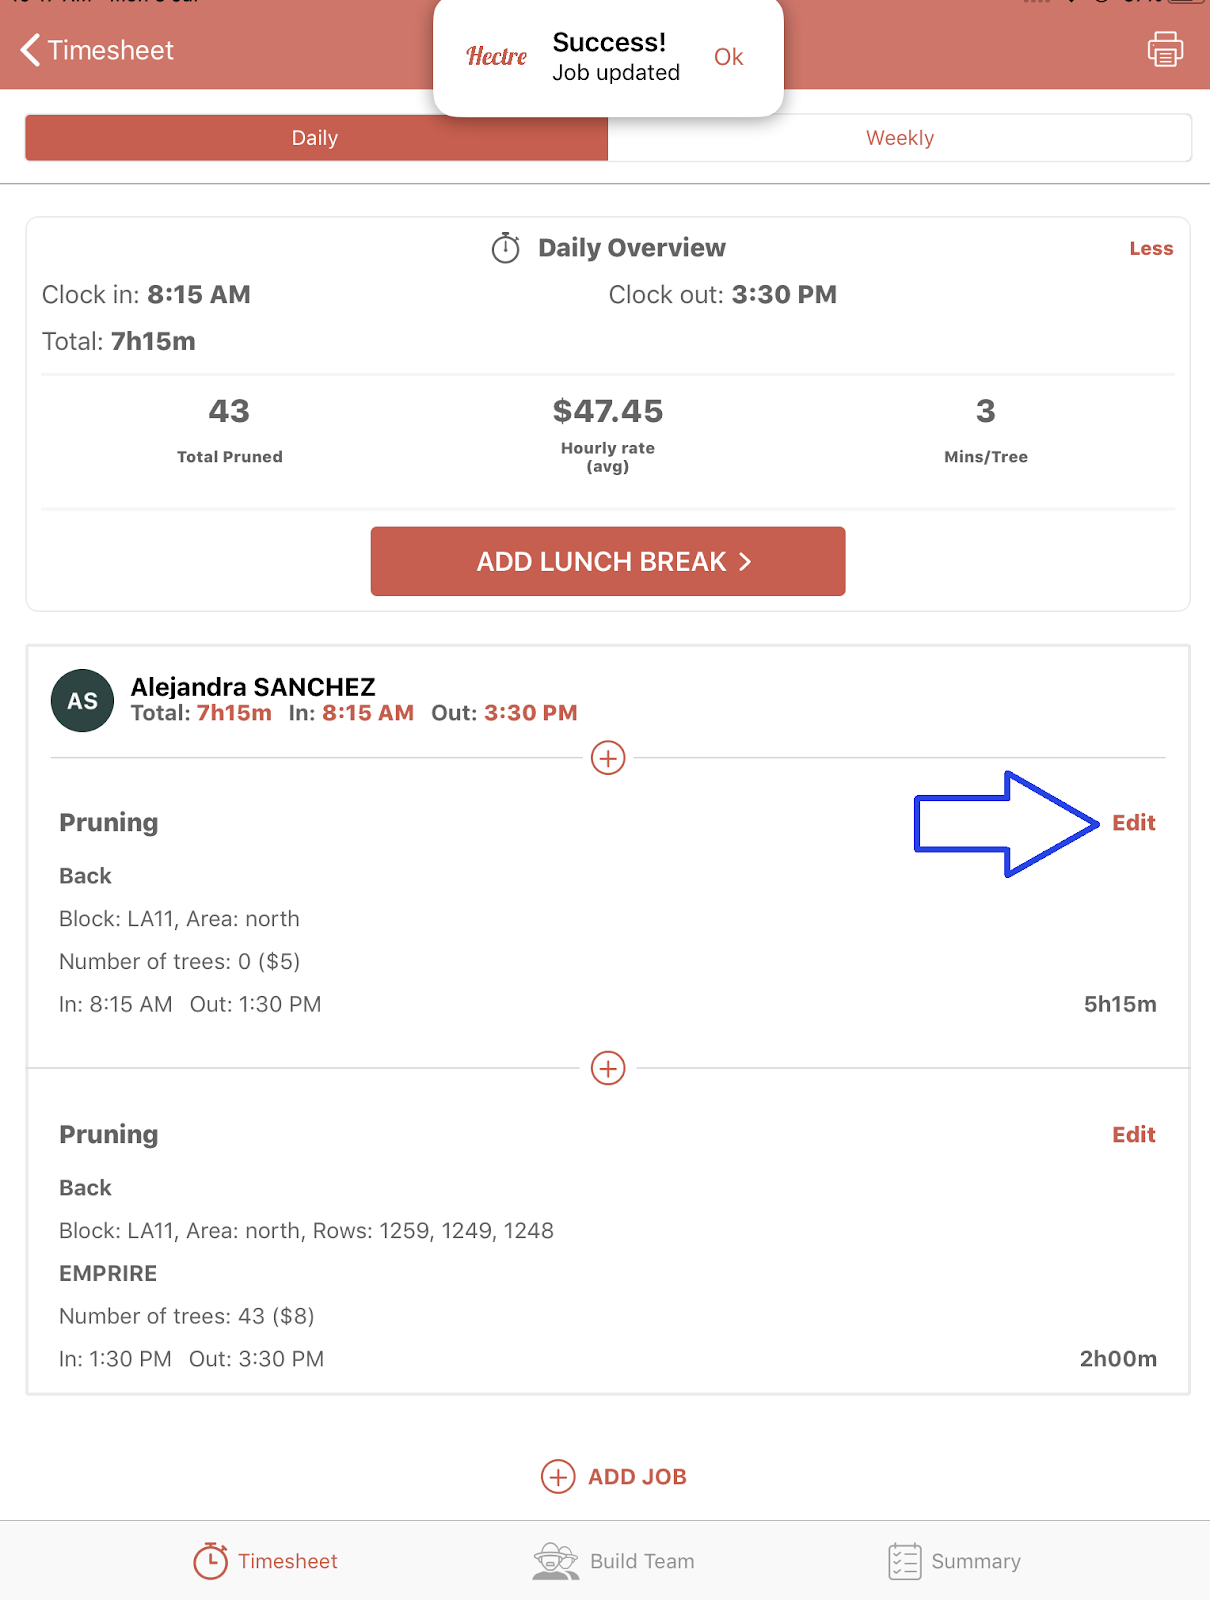
Click Edit on the job you want to edit
Note
When editing timesheets, you may find it easier to first delete the lunch break (swipe left and delete) before editing the jobs. This is because editing any jobs that happen before the lunch break can be harder to change the times of. Lunch breaks also split jobs into 2 parts (1 part before the break, and 1 part after the break). If you remove that lunch break first, then those 2 parts will be reunited as 1 and you can edit that job as a whole. Don’t forget to add the lunch break in after!
Step 3
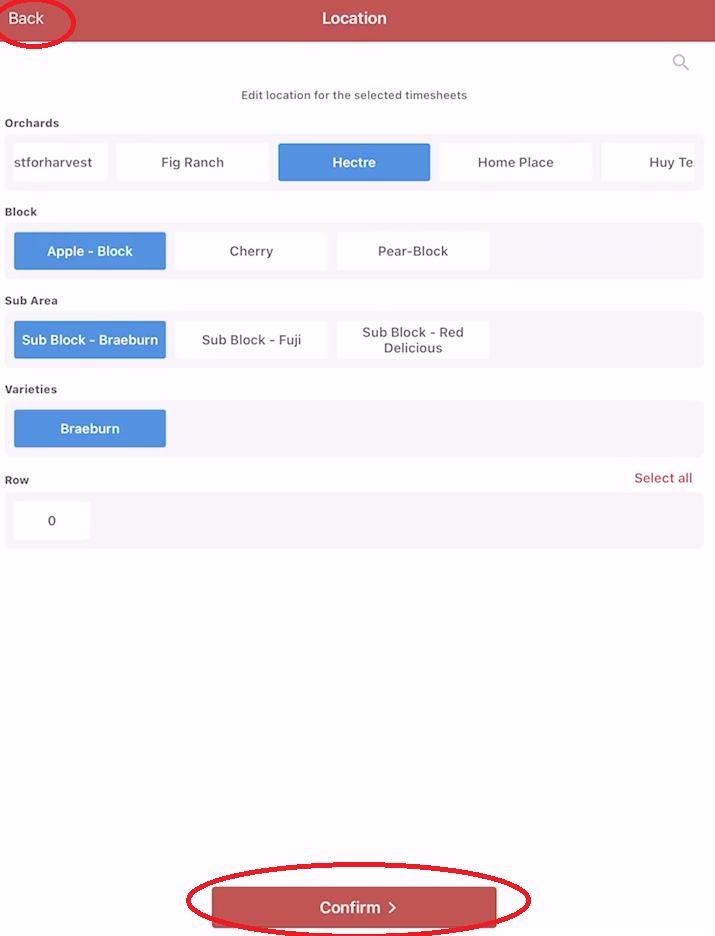
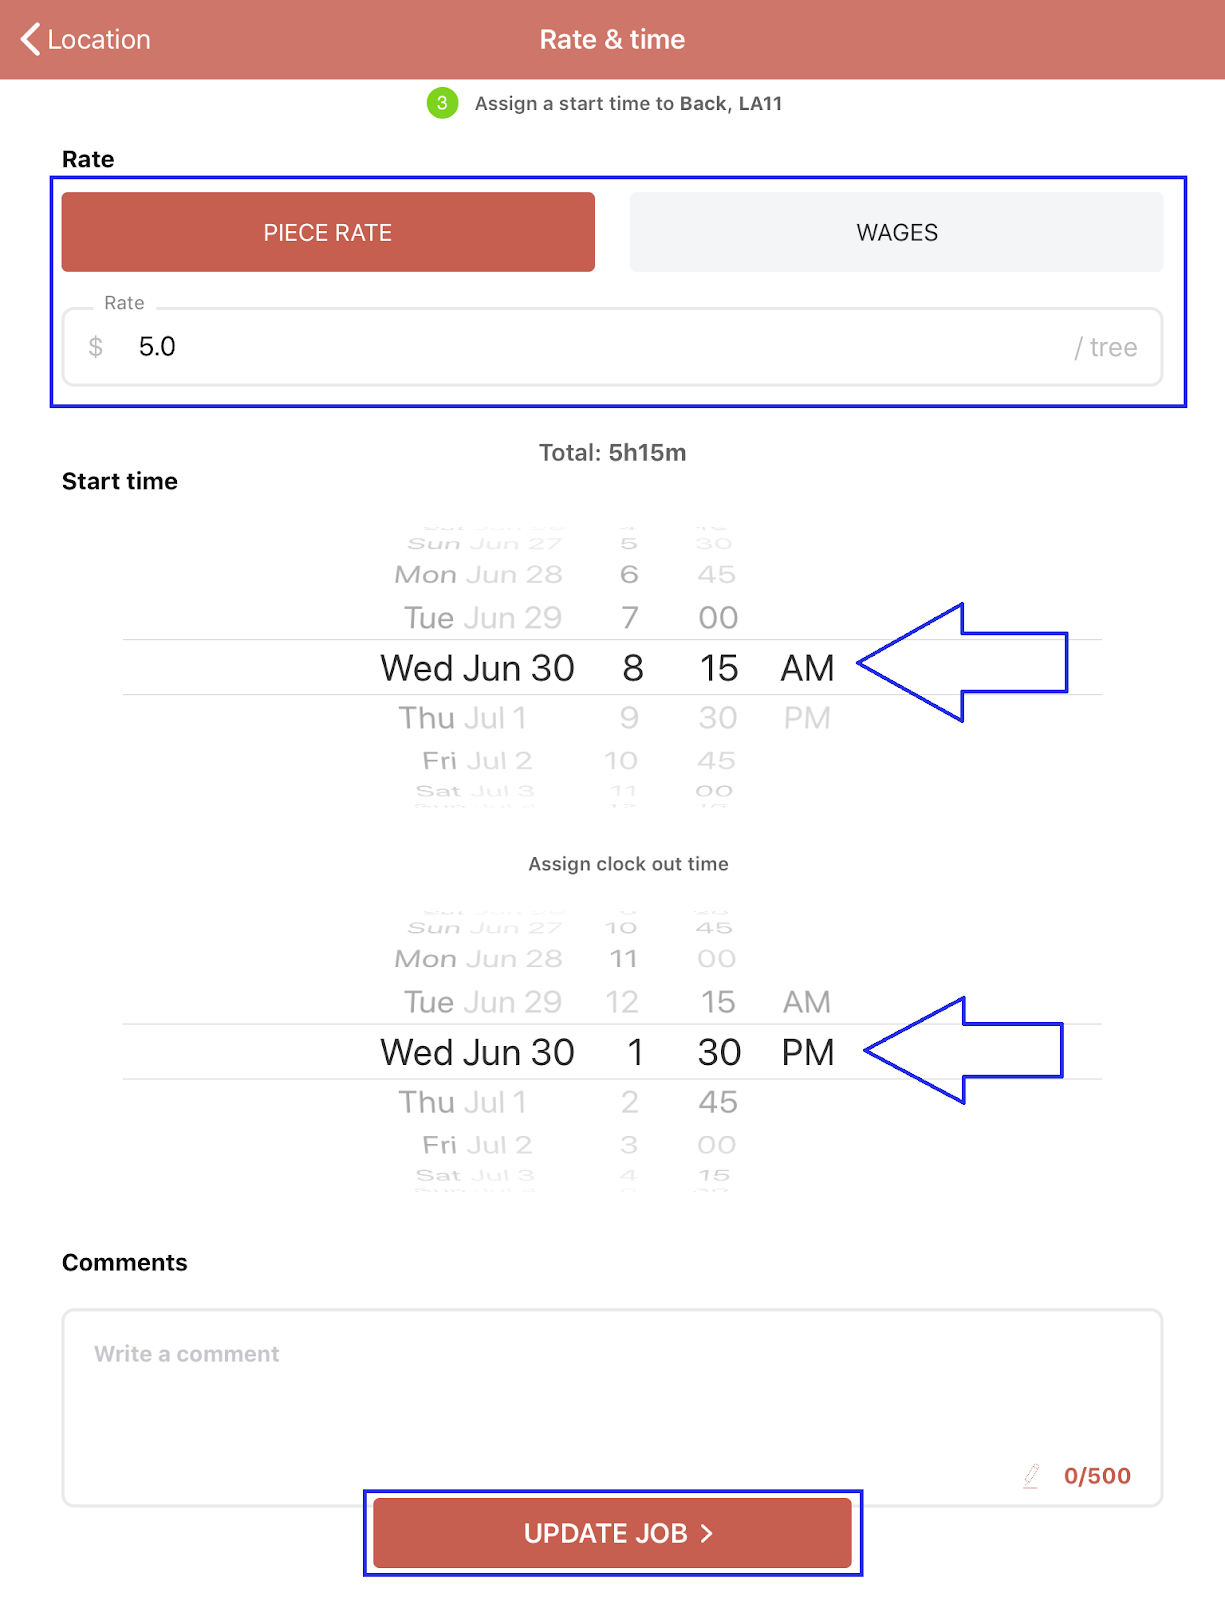
You’ll be prompted to update the
- Job type
- Location
- Start time
- Clock in time
- Clock Out time
If it's a piece rate job, you'll be prompted to update the Rate (piece rate / wage)
Editing Multiple Timesheets

Step 1
-
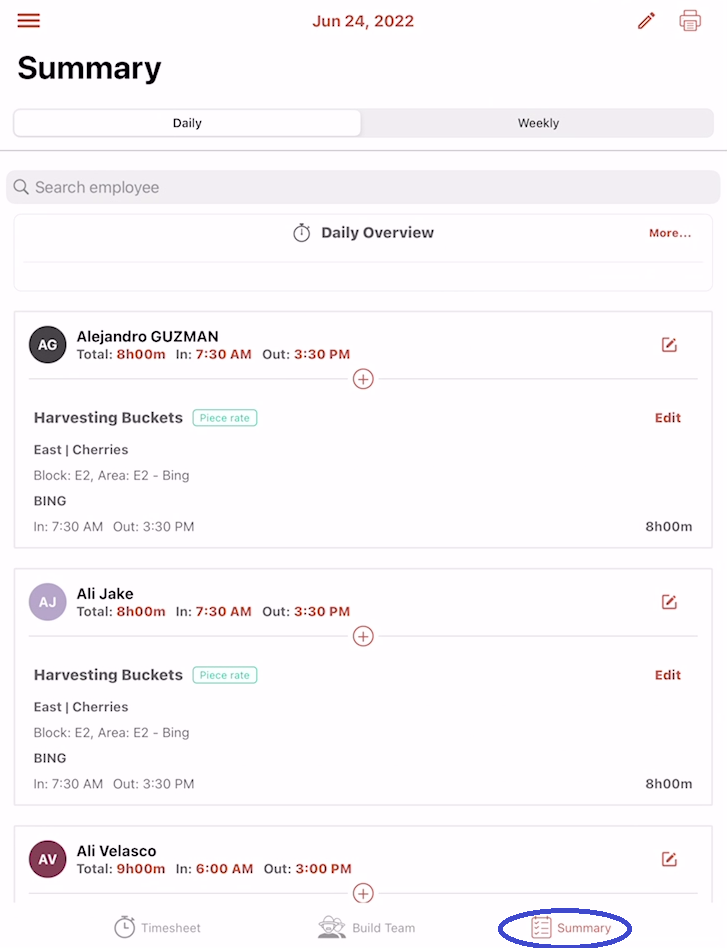
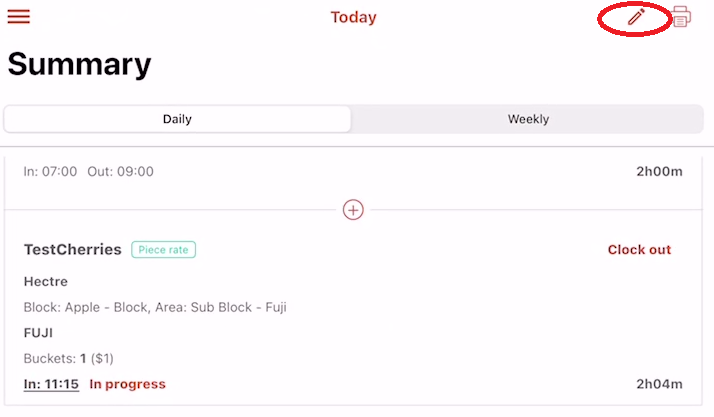
Navigate to the Timesheet module's Summary view.
Step 2
- In the Summary view select the pen icon to the top right of the screen. This will open a dialog in which you can select an edit action you wish to do, for example, change location.
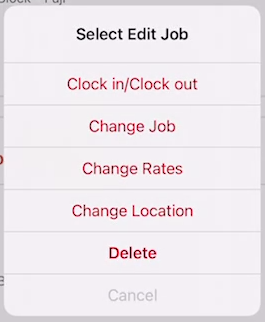
Step 3
- In the select edit action dialog there will be a list of all the edit actions you can make on the timesheets. Select the edit action you wish to perform on your timesheets.
Note! Deleting timesheets is now also part of this process.
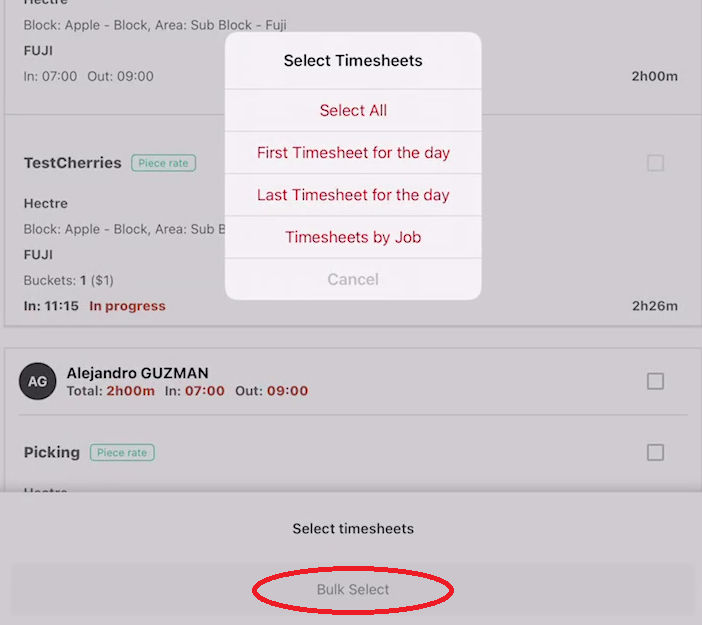
Step 4
Select the timesheets you wish to edit. Do this by either
- Manually checking each box, or
-
Select the Bulk Select button to make a bulk selection
- Once timesheets have been selected click on confirm
Note: If you wish to exit the edit process from here simply select the Cancel button located at the top right of screen.
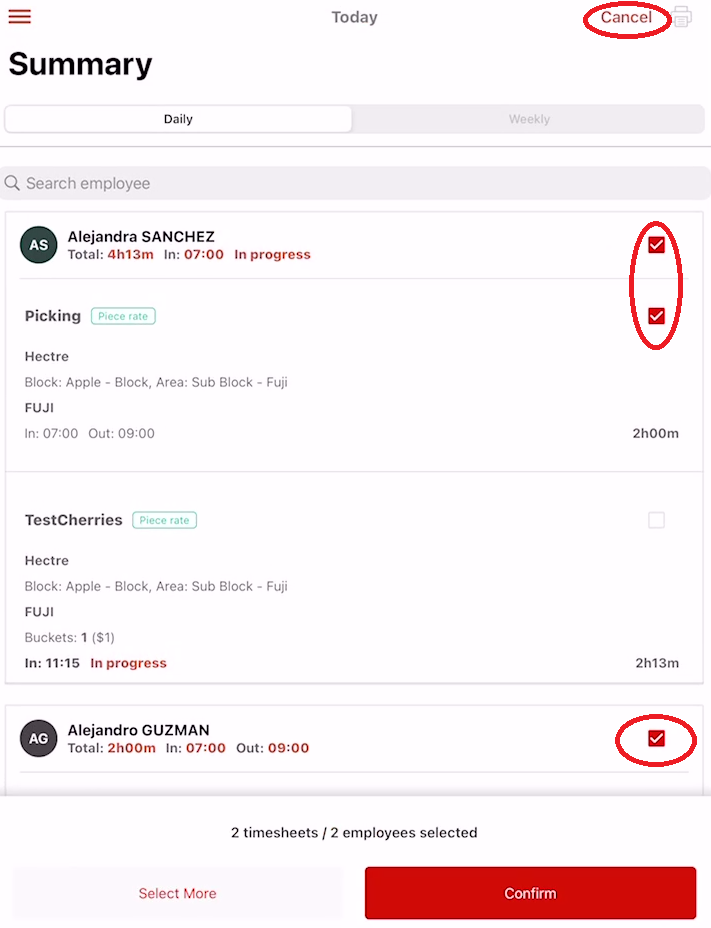
Step 5
-
Select the changes you want to make and click on the confirm button